Monday, September 29, 2008
Cindy's Healthy Muffins
Are you mesmerized yet? Doesn't this picture look like a muffin Willy Wonka would serve at a tea party?
My good friend, Cindy, brought this yummy morsel to my doorstep the other day and I was blown away. Let me tell you why.
Cindy is my "Healthy Hero". She only puts healthy food into her cute little body. I am amazed when we go out for lunch and I order up my onion rings and she orders her house salad, dressing on the side - no meat please! Such restraint, such will power for such a little woman! I have seen her drink green concoctions for lunch that would make your head spin.
Since my little "episode" last year, I have been trying to eat a healthier diet. It is hard, but Cindy is so encouraging! When she brought me this muffin the other day, I have to admit, I was a bit scared. A whole lot of healthy is packed into each bite - but wow they are so yummy! It tasted like a little individual carrot cake - YUM! If healthy tastes like this - pass the muffin with a shot of that green stuff to wash it down!
Here is the recipe for the muffins. They are SO healthy, full of fruit and even veggies, especially when you substitute Sucanat ($2.99 at Target) for the sugar. Again, if you are not expecting them to taste like Krispy Kreme donuts, they are very moist and yummy. Hope you like them...
Morning Glory Muffins cooking light 6/99
2 1/2 cups flour (I used whole wheat)
1 cup brown sugar (I used Sucanat)
2 tsp baking soda
2 tsp cinnamon
1/2 tsp salt
2 cup shredded carrot
1 cup shredded apple
3/4 cup raisins
1/3 cup chopped pecans
1/4 cup coconut
1-8oz can crushed pineapple, drained
1/3 cup oil
1/3 cup apple butter
2 tsp vanilla
2 large eggs
2 large egg whites
Preheat oven to 350
Lightly spoon flour into measuring cup. Combine flour and next 4 ingredients (thru salt) in large bowl.
Stir in carrot and ingredients thru pineapple.
Make a well in center of mixture.
In another bowl, combine oil thru egg whites. Stir with a whisk. Add oil mix to flour mix. Stir until moist.
Spoon batter into coated muffin pans. Bake 350 for 25 min. or until springs back when touched in center. Remove immediately. Cool on wire rack.
Makes 2 dozen
Friday, September 26, 2008
Gourmet Club: Western Style
About two weeks ago our invitation arrived for Gourmet Club! You can imagine my surprise when the recipe I was given to make was "Armadillo Knuckles"! As I looked further at the recipe, I knew I could eat anything if it was wrapped in bacon!
Giddy Up - we were going to a Hoe-down!!!
The "Big Red Kitchen" Ranch was the location of our get together and of course Robin Sue and "Himself" went all out to Hoe-Down! There was a saloon set up in the corner of the kitchen, ax throwing outside, and bottle target in the living room! Being a drunk, ax murderer and sharp shooter - I knew I had hit the Jackpot! Just kidding, although being a wife, mommy, and homeroom mom sometimes I feel like the previous! Check out that Cowboy Caviar in the picture above - Mosey on over to "Bri's Tiki Bar" for the recipe. It was Rootin' "Tootin'" - and I mean Tootin' - but oh so good!
Robin Sue, left in picture, was our mess hall manager for the night. Sabrina, right in picture, was ready to wrangle the boys for dinner (or was that wrangle the boys FOR their dinner)? I was the sheriff in town - and no one was getting by me! (Literally - I ate so much that night, no one COULD get by me!)
Robin branded our steaks, and even though she put her name over all the steaks - we insisted that we should get to eat one! She agreed and let us each own our own cow - Bessy was mighty fine!
Everyone had a wonderful time and all the touches throughout the house were amazing - down to the yellow roses of Texas as our centerpiece!
Check out the adorable place setting. Swing over to the "Big Red Kitchen" Ranch to see where they came from! Very funny!
Now that I have given you a little tour around the "Big Red Kitchen" Ranch - let me give you the recipe for the "Armadillo Knuckles".
Doesn't this bowl look like it could be just that. Thankfully it is only a bowl of wonderful little waterchestnuts. These crunchy little morsels make the appetizer unforgettable!
Bacon Wrapped Armadillo Knuckles
2 cans whole water chestnuts
1 pound bacon with slices cut into thirds
Wrap bacon around each nut and secure with a tooth pick. Place in a tin foil lined baking dish (to help with clean up) and bake in 350 degree oven for 45 minutes or until bacon is cooked through. Remove "knuckles" from the grease, keep toothpicks in, and place in a clean lightly greased baking dish. Use something nice so you can serve it in this as well.
Mix together:
2 cups ketchup
1 cup white sugar
3 T. soy sauce
Pour over bacon wrapped knuckles and bake at 325 degrees for 40 minutes or until sauce is bubbly and gooey!
At the end of the night, when all the cows were put away (in our tummies) and all the wood had been chopped (at least sliced a little), and all the bottles had been shot (then recyled of course) we knew we were very fortunate cowboys. We took off on the "Happy Trails" knowing we had good friends, full tummies, and happy hearts! Life is good!
Check out that bleach spot on the back of my hubby's shirt. That will teach him to let a cowgirl do his laundry :-)
Thursday, September 25, 2008
Pumpkin's for Fall!
WELCOME FALL
Growing up I always lived many hundreds of miles from both my grandparents. They each did special things to make us know that we were loved. My dad's dad and step mom always sent us the most perfect pumpkins for Halloween. They weren't just any pumpkins - they were ones they had grown and "Pumped" full of love throughout the season. As soon as the weather started to get cold - I knew my package would arrive soon. My grandpa continued this tradition with my children as well. Each year they couldn't wait for grandpa's pumpkins! Grandpa passed away last year at 97, and so my parents are picking up the tradition of sending the pumpkins to my girls....sort of!
A trip to the woods starts the pumpkin painting process. "Gumpa"
as my children call my dad, cuts some wood off a fallen tree, removes the bark and they are ready for orange paint. The orange paint is applied liberally on to the wood log (many coats are necessary). After the orange base coat he leaves the rest of the work to "Gumma", who paints on the faces!
My parents have these on an outside bench at the cabin, or they can be found in Virginia where I live, or California where my brother lives or somewhere USA. One can never have too many pumpkins for a scary October and a touch of Fall. Face painted pumpkins can be found on the inter-net or in pumpkin decorating books or your imagination. A neighbor stopped by last year and said to my mother she thought she might do a small fence for her child - the ones you see in gardening and landscaping sections of Home Depot that are about five inches tall and held together by wire. Cute!
I hope this prompts a walk in the woods and a "Paintfest" for your family!
Wednesday, September 24, 2008
WW Black Bean Soup
With Fall at our doorstep I knew it was time to break out this favorite Weight Watcher recipe. I pair this with the Pan Bagnat recipe I made last week. It makes the perfect lunch with girlfriends!
This recipe was adapted from the Weight Watchers New Complete Cookbook - Black Bean Soup (page 74)
Makes 4 servings
Black Bean Soup
2 teaspoon olive oil
2 onions, chopped
2 jalapeno peppers, seeded, deveined and chopped (wear gloves to prevent irritation) I substitute 2 oz chopped green chillies in a can for a little less heat
1 garlic clove, minced
1 (15 oz) can black beans, rinsed and drained
2 cups low sodium chicken broth
1 teaspoon ground cumin
1 teaspoon ground coriander
2 Tablespoons dry sherry
1 teaspoon lime juice
1/2 teaspoon salt
2 Tablespoons chopped cilantro
1 small onion or 2 scallions, minced
1. In a medium nonstick saucepan, heat the oil. Saute the chopped onions, jalapenos and garlic until softened, about 5 minutes. Stir in the beans, broth, cumin, coriander and 1 cup water; bring to a boil. Reduce the heat and simmer, covered, until the flavors are blended, about 45 minutes. Remove from the heat; stir in the sherry, lime juice and salt. Cool slightly.
2. Transfer the soup to a food processor or blender; puree. Pour back into the saucepan and heat to serving temperature. Serve, topped with the minced onion and cilantro.
Per serving: 207 Calories, 4 g Total Fat, 1 g Saturated Fat, 0 mg cholesterol, 292 mg Sodium, 31 g Total Carbohydrate, 7g Dietary Fiber, 11g Protein, 78 mg Calcium.
Points:4 per serving.
Monday, September 22, 2008
2 Cheap Chicks & $20!
About a month ago my sweet little friend over at Big Red Kitchen, Robin Sue, called me with a challenge. Being the frugal mommies we are - she asked if I wanted to be part of a dynamic duo - "2 Cheap Chicks and $20". The concept would be that we would pick different grocery stores and make a gourmet meal for under $20. As soon as she asked I was all over it! Just a quick note here about Robin Sue. Yes - she is freakishly small, and yes I am freakishly tall. My 6 feet put beside her 5 feet make us look more like Mutt and Jeff rather than a dynamic duo. What can I say - I KNOW good things come in small packages and Robin Sue proves that! Click over to her blog, Big Red Kitchen, to see what wonderful things she did with $20!
The challenge was on. We decided our first location would be Trader Joe's. The rules would be to make 3 dishes to feed 4 people for under $20. Sounded easy enough, so I scoured through cook books trying to find cohesive recipes that would lend themselves to such a tight budget.
We brought our calculators, $20, and imaginations! I had visions of preparing a wonderful meal with a gourmet dessert, but when you start adding up all those little ingredients that go into making just one dish, your expectations readjust slightly.
We slowly filled our carts and headed for the check out while holding our breath. Robin was sure she had gone over while I was completely confident in my math skills. I had checked and rechecked and proudly went through the check out with only my 20 dollar bill. All I can say is thank goodness for the "Take a Penny, Give a Penny" dish. Yikes - I had gone over 6 cents!
Here is the finished meal. If you ask me - it was worth the 6 extra cents! See if you agree.
The first side I chose was Baked Honey Onions. I love onions and I feel they play second fiddle too much of the time. I wanted a recipe to highlight this wonderfully tasty vegetable! The recipe I found in my Giant supermarket magazine was just the thing.
Baked Honey Onions
1 cup chicken broth
1 Tablespoon butter
2 teaspoons honey
1/4 teaspoon lemon rind
1/4 teaspoon paprika
1/4 teaspoon freshly ground pepper
2 Tablespoons fresh parsley, finely chopped
3 large white onions, quartered
1 cup cheddar cheese, shredded
Preheat oven to 325. Mix all ingredients (except the onions and cheese) together in a bowl. Coat a casserole dish with nonstick cooking spray. Arrange the onions in a single layer in the dish, and cover them with the chicken broth mixture.
Cover onions and bake for 1 hour. Sprinkle the cheese on top. Return to the oven, and bake for 5 more minutes, or until the cheese is melted. Serves 4.
Green beans are always a hit in my house and what could be better than adding Pancetta to these already yummy morsels!
Green Beans with Pancetta and Brown sugar
1 bag frozen green beans
2 Tablespoons Brown sugar
4 oz Pancetta
Cook Pancetta in fry pan. Continue to remove grease as it cooks but retain it for later use.
Cook green beans in microwave according to package.
Drain green beans and toss with 2 Tablespoons brown sugar. Add cooked Pancetta and desired amount of grease.
Chicken was the last item on my menu. When my hubby and I moved to Rochester N.Y. we were introduced to Chicken Francese. I could not get enough of it when we lived there and sadly - we don't eat it very much anymore. I knew this was the perfect opportunity to introduce my children to one of my favorite dishes. The original recipe calls for skinless, boneless chicken breast, but I was on a budget! Chicken tenders would have to do this time.
Chicken Francese
2.5 lbs. Boneless, Skinless, chicken breasts
2 cups chicken stock
3 eggs, beaten
1/2 olive oil
3/8 cup white wine
1/4 cup heavy cream
1/4 cup lightly salted butter
2 Tablespoons lemon juice
Flour for dusting
pinch of salt and pepper
1. Season flour with salt and pepper.
2. Lightly dust chicken breast in flour and dip in beaten eggs.
3. Saute chicken in vegetable oil, approximately 3 minutes per side on medium heat.
4. Remove chicken from pan and deglaze with white wine and chicken stock.
5. Reduce liquid by half and add heavy cream.
6. Finish with lemon juice and adjust seasoning.
7. Return chicken to sauce and simmer for 5 minutes.
Enjoy!
I could not make an extraordinary gourmet dessert - however with $1.50 left over I treated my family to 3 triangles of a Toblerone bar. Not a bad way to end a meal!
I hope you have enjoyed reading about our $20 adventure! Check back Wednesday for a Weight Watcher's meal and then Friday for a recap on our Gourmet Club that met over this past weekend! Robin Sue and the Dude "Himself" hosted a mighty fine Hoe-down! Can't wait to share the pictures!
Friday, September 19, 2008
Turning 6 - Sushi Style!
Each year my girls and I have so much fun planning their birthday parties. It starts - oh about the day after their last birthday party - and lasts up until the guests arrive for their special day. When my youngest turned 6 she was insistant on have a "Sushi Party". She loves California rolls, wonton soup, edamames, and that lovely salad they always serve with the meal.
Quick story about my youngest Jensen - She was born without the fear gene! Recently, when we were out having sushi, I was rooting in my purse to find a kleenex and stumbled upon the shower cap from a hotel stay. I started to laugh and told my kids I would give either one of them a dollar if they put it on in the restaurant - eat the rest of dinner and walk out like nothing was the matter. My oldest, Logan, died right there on the spot, and was just as mortified when Jensen said "easy money - hand it over"! She did it alright. She put that shower cap on, wore it proudly, and even stopped up at the register and got us all dinner mints. No fear! (I completely envy her)!
My mother, who is always helping me put these special events together, made these adorable oversized oragami dolls to welcome guests as they arrived at Jensen's Sushi house.
With my hubby's help, I took the legs off our dining room table, which really set the mood. My mom found the sweet little centerpiece dress at Marshall's.
My hubby, my folks, and I all wore authentic Japanese robes and welcomed guests with a bow and "Ohayo Gozaimasu".
For the craft, each little girl was given a canvas. My mother is holding up a Japanese card with different sayings on it.
We made photo copies for each girl of different symbols they could put on their canvas. Some drew the symbol for love, others' happiness, but they all had "This is fun" written all over their face!
Since her birthday is February 11th - we always try to incorporate a little valentines action into each party. This one was no different. For the game, we had two huge bowls of conversation hearts. Each girl was given child friendly chop sticks. When the timer started each girl tried to grab as many hearts as possible with her chopsticks and put them in the cup in front of them - Everyone was screaming! They had a blast and all agreed it was harder than they thought.
When it was time to eat they came up and found their goody "Bento Boxes" at their places. I found little sushi magnets, sushi erasers and fun little Japaneese candy and toys. Lunch consisted of sweet sticky rice, california rolls, edamames, little PB&J's that I cut to look like sushi and fruit. Of course they all had to eat with chop sticks. I think they had as much fun eating as they did playing the games. I had her cake made at a local grocery store. I gave the saying "Happy Birthday Jensen" in Japanese to the bakery. They did a beautiful job putting the same expression on the cake.
When the day was all done they both agreed that they...
Thursday, September 18, 2008
Peanut Butter Candy cake
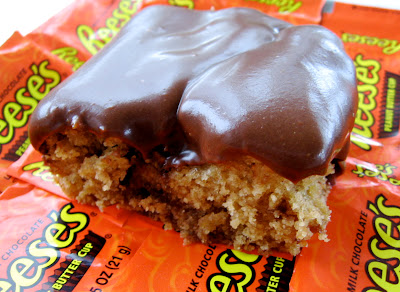
The other day as I was blog surfing I went to The Crepes of Wrath and the most amazing cake popped up on my screen. She had covered her lovely cake with peanut butter cups. It looked like she rolled the entire cake in those yummy treats.
Pop over and take a look!
Wasn't that amazing?
When I saw that - it reminded me of a cake that my mom used to make when I was young. It was one of my favorites - and I couldn't believe I hadn't made it in years. My taste buds were ready and I knew my family (OK - I) needed it.
It is not as beautiful as The Crepes of Wrath's, but the taste is wonderful!
Peanut Butter Candy Cake
1 3/4 cup boiling water
1 cup quick-cook rolled oats
1/2 cup margarine
1 cup light brown sugar
1 teaspoon vanilla
1 cup white sugar
2 eggs
1 1/2 cup unsifted all-purpose flour
1 teaspoon baking soda
1/2 teaspoon baking powder
1/4 teaspoon cinnamon
1/4 teaspoon salt
5 (.6 oz size) milk chocolate covered peanut butter cups (I double this amount)
Combine water and rolled oats, cool to room temperature. Set aside. Cream together butter, brown sugar, sugar and vanilla; beat in eggs. Blend in oatmeal mixutre. Combine flour, baking soda, baking powder, cinnamon and salt; add to creamed mixture. Beat 1 minute on medium speed. Pour batter into greased and floured 13 x 9 x 2 inch pan. Chop peanut butter cups and sprinkle on top of batter. I usually chop each cup into 9 pieces - as shown in above picture. Do not stir.
Bake at 350 for 40 to 45 minutes or until cake tests done.
For Frosting:
3 Tablespoons butter
3 oz unsweetened chocolate
About 3 cups confectioners' sugar
1/2 cup milk
1 teaspoon vanilla
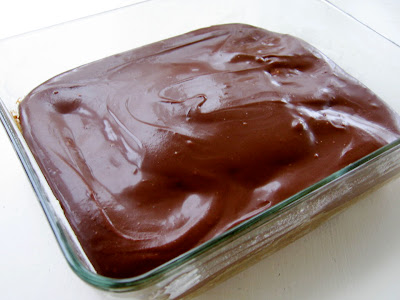
Melt butter in small sauce pan. Add chocolate, stir constantly over very low heat until melted. Pour into small mixing bowl. Add remaining ingredients; beat until well blended. Chill to spreading consistency, 10 to 15 minutes. Frost cake.
Try it - I'm sure your family will be WILD about it!
Wednesday, September 17, 2008
WW Pan Bagnat
When I am faithfully doing Weight Watchers I make this recipe at least once a week. I usually pair this with Weight Watcher Black Bean soup (Next Wednesday's Post). This meal always fills me up - and it is only 8 points for the entire meal! I made this the other day and my girls wanted it in their lunch. They came home and said it was one of their favorite sandwiches. It helps that I purchased the tomatoes from the farmers market and they were out of this world!
Makes 4 servings.
2 very ripe tomatoes, peeled (I never peel them)
One 8 oz loaf day-old French or Italian bread, halved lengthwise
1/3 cup shredded part-skim mozzarella cheese
1/4 cup finely chopped flat - leaf parsley (I think basil would be an amazing substitution)
2 scallions, thinly sliced
2 Tablespoons white-wine vinegar
2 teaspoons extra virgin olive oil
Freshly ground pepper, to taste
1. Halve each tomato horizontally; with a spoon, scoop out and discard the seeds and pulp. Dice the tomato shells.
2. Pull out the soft insides of the bread and tear into pea-size pieces. Transfer to a medium bowl; stir in the tomatoes, cheese, parsley, scallions, vinegar, oil and pepper.
3. Fill the bread loaf with the tomato mixture; close the bread and wrap tightly in plastic wrap. Refrigerate overnight; just before serving cut into 4 sandwiches.
Per serving: 222 Calories, 6g Total fat, 6 mg Cholesterol, 404 mg Sodium, 34g Total Carbs, 3g Fiber, 8 g Protein, 122 mg Calcium.
4 Points per serving.
Tuesday, September 16, 2008
Stuffing Balls (a.k.a. Thanksgiving in a bite)
My magazine collection was taking over my bedroom, and I decided it was time to go through all my cooking articles and rip out the 2 or 3 pages I thought I would really use. I stumbled upon this recipe for Stuffing Balls in the Food & Family Holiday 2005 issue laying next to my bed. (Now you know how long they had been sitting there!)
1 lb ground pork
1 package (6 oz Stove Top Stuffing Mix for Chicken
3/4 cup cranberry sauce
1 egg
1/4 cup melted butter
Preheat oven to 325. Brown meat; drain. Combine with dry stuffing mix in a large bowl.
Stir in cranberry sauce, egg and 1 cup water. Shape mixture into 16 balls. Place balls on foil-covered baking sheet; brush balls with melted butter.
Bake 20 minutes.
Makes 8 servings. 2 balls each.
My girls loved these. My oldest, Logan, said that it tasted like Thanksgiving in a bite.
This will definitely go into my "Fast Fix" meal rotation - now that sports are in full swing!